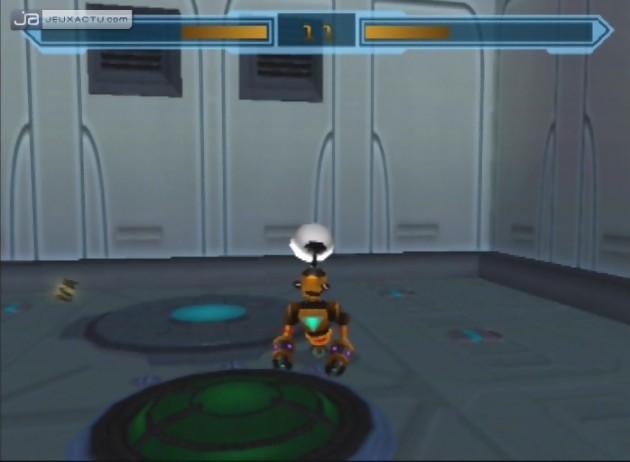
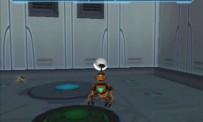
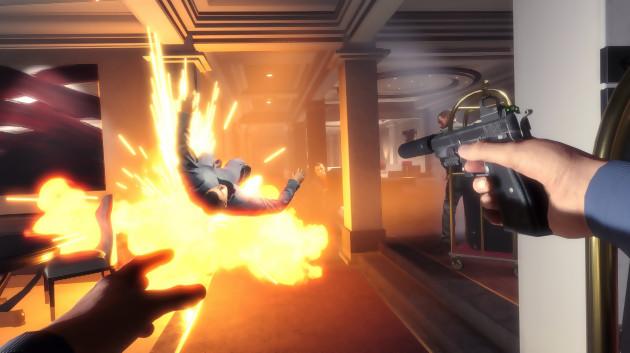
8 - PLANET NOTES
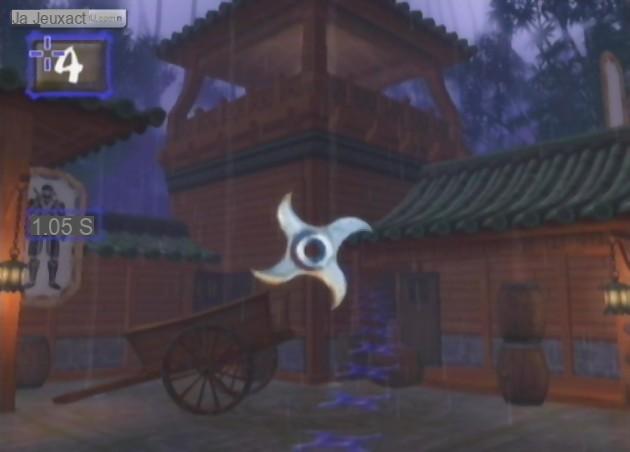
After descending lower via the freight elevator, begin the visit to this planet by taking the passage on the left with the globe hanging above the entrance. The enemies waiting for you are quite tough and taking them out from a distance is the smartest way to go. So cross the bridge to come across a freight elevator that will take you to the upper floor. Keep moving forward while taking care not to fall between the different platforms. Further on, you will see a new elevator, which you should take. Master your enemies and in particular the fireball-spitting flying machine that you will have to destroy first if you don't want to end up in a barbecue. Take the freight elevator and pick up the nanometer a little further. Then stand on the teleporter to return to the start of the level. Now take the direction of the bridge. Enter the building located a little after [Photo 025]. Freeze the water point to reach the next platform. As you leave the building, armed enemies will block your way. Use your weapons to overcome it then continue to advance to the freight elevator. You have just passed the checkpoint. Get rid of the flying machine then go activate the green switch using your dynamo a little further [Photo 026]. Then move forward while taking care not to fall. Once on the other side, head to the end of the platform to start a cutscene. Then take your momentum, jump and let yourself hover on the lower platform. See here on the other side of the electric barrier which prevented you from reaching the second part of the city. Cross the large bridge then open the door by turning the screw fixed to the ground [Photo 027]. Enter the building, climb the wall and walk to the water point. So freeze the fleet to access the platform above where you will find a new nut to unscrew. A bridge will appear near you. Take it to access the other side of the bank. Melt the frozen water then dive to get to the other side. After surfacing, head to the frozen water point where you'll see a nut attached to the ground that you'll also need to screw on. Then thaw the water point and go through the tunnel to exit on the other side. Once on dry land, freeze the water again so you can walk on the ice and reach the upper platform. Climb the stairs and further, you will see the bridge that you made appear by aiming for the nut. Cross it until you reach a new water point. The latter, by the movement of the pumps next to it, will see its water level rise and then fall. Wait until the water is at its maximum to freeze it and thus be able to pass to the other side [Photo 028]. You will come, further on, to a large basin which also has its water level which changes. At the bottom of this well, a huge fish is waiting for you to satisfy its stomach. Wait until the water is at its lowest level to freeze it and thus take the tunnel, which is now accessible. At the end of this passage, you will have to thaw the new water point to reach the upper part. Be careful not to get swallowed up by the fish. Once on the edge, freeze this same water point when it is at its maximum to access the opposite shore. Again freeze the next well when the water level allows you to pass the tunnel and then drop down to take it. Stay at the level of the tunnel to heat the water, you will be safe. Hurry to reach the next ledge when the water level will rise. A cutscene will start right after. Accept the payment to see the message and get new coordinates to access a new planet. Get in the taxi [Photo 029] in order to return to your ship. You can now access Slim Cognito, a point of sale that allows you to upgrade your ship. Then take the direction of the frozen base in Syberius.
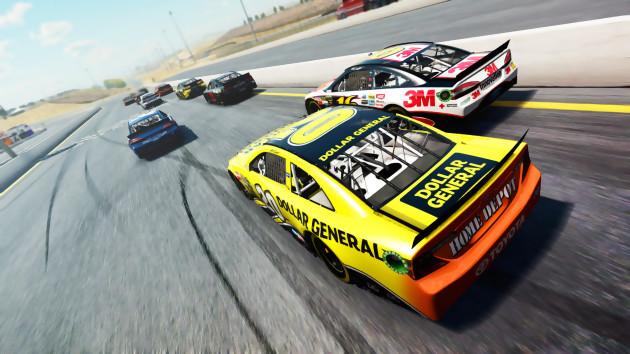
9 - PLANETE SYBERIUS
The passage to your left is the only path to follow to begin the visit of these snowy places passage is available when arriving on the planet. Liquidate the various enemies that will arrive and then cross the bridge. Jump onto the platform on the right and continue forward without taking too much damage. Shortly after, an elevator will take you to the lower floor. Then jump from platform to platform and knock out as many mechanical spiders as possible to increase your health bar. This becomes essential as the enemies become more and more resistant. After the checkpoint, climb into the vehicle. Once you destroy all the mechanical spiders, the door in the front of the truck will open. Draw your grapple to move from truck to truck. Ratchet's sworn enemy will point the end of his elder installed on his flying skateboard [Photo 030]. Lead him to scare him away and access the truck opposite. Spray the spiders inside to open the front door. Use the swinger again to finally arrive at the head of the procession and face your enemy again. Once you scare it away again, the truck will overturn on an ice floe. Climb the ladder and move forward without getting hurt too much to a new outlet. You should have enough bolts to get the synthenoid. Then advance to the meeting place with your enemy number 1. The real fight can finally begin [Photo 031]. The latter will not hesitate to call his henchmen as reinforcements. So use your freshly acquired and highly effective synthenoid. You finally got the guinea pig you were looking for.
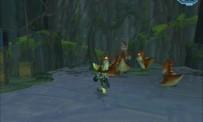
10 - PLANETS OF THE CAMP
After the charming cinematic, here you are on a new planet where you will get to know some pretty tough creatures. Gravity bombs will be very effective against these worms from elsewhere. As you move forward, you will come to a rather tricky passage where you will have to jump from platform to platform, taking care not to fall into the lava, otherwise you will have to start again from the beginning. Just after, you will get a level 2 adjustable wrench much more efficient than the original. A point of sale is at your disposal if you run out of ammunition. Progress until you see a hook point for your grappling hook [Photo 032]. Swing to the other side until you reach the new attachment point. Here it is a bit more tricky. Hang on, swing then let yourself soar above the lava [Photo 033]. This is where you meet Angela. After the short cutscene, take the freight elevator to find your ship in rather poor condition. You need to find 10 crystals to hope to fix it. Beware as many enemies will pop up when you approach these diamonds. As soon as you have ten in your pocket, go back to the mage to put your ship in working order. If you have enough bolts, you can go buy the lava cannon for 25000 nuts. Now take the direction of the planet Dobbo.
11 - PLANETS DOBBO
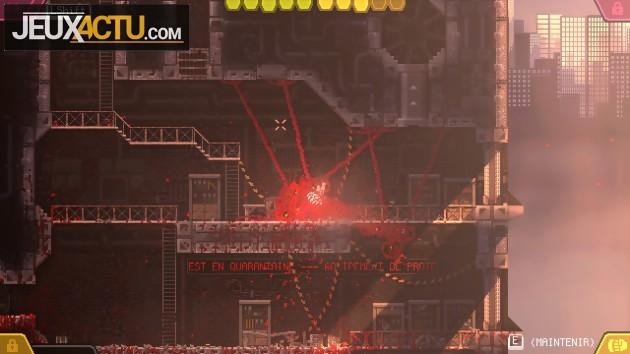
Head left to find a teleporter that will take you into the center of town. Once there, three sentries will try to prevent you from passing. Neutralize it then resume your journey. You will then have to perform a series of jumps to avoid being electrocuted. Move forward until you reach the end of the course where you will have to let yourself glide to the bottom where enemies are waiting for you. Then take the electrified path without hurting yourself and then use the elevator at the end. After destroying the flying machine, use your grappling hook to get to the other side. Then take out your dynamo to activate the switches [Photo 034]. You will have to be quick and skilful to pass this rather delicate platforming phase. The checkpoint is located just after. Approach the central terminal to initiate a cutscene. You need a new ship that you can recover on another planet. So we'll have to come back here later. In the meantime, use the teleporter to return to the start of the level. You will see a sell point to the right of the teleporter. Jump on the platform opposite to join to get yourself a new armor for the sum of 25000 nuts. Further, you will see switches to activate using your dynamo [Photo 035]. Jump on the platforms that will appear to reach the next bank. You will then be attacked by robots equipped with double guns as well as by sentries. After getting rid of it, use the grappling hook to swing onto the platform in front. Further, you will have to fight a horde of robots, take out the heavy artillery so as not to lose too much energy. Then climb the ladder then hang on the hook just after and swing on the next part. Clean the next room to be quiet then use the swinger to reach the platform located on the other side of the water point. Further on, you will again be bothered by robots armed with double guns. Destroy them then climb the small turret to reach the attachment point [Photo 036] which will allow you to use your swinger and get to the other side. Follow up with a double jump and let yourself glide over the next part to then be attacked by other enemies. At the far left, use your dynamo to make platforms appear that will allow you to pass this empty space. You will have to play the Tarzans just to the right to arrive on the platform located at the very end of your horizon [Photo 037]. The checkpoint is placed just after this passage. Watch the cutscene to then be taken to a new planet.
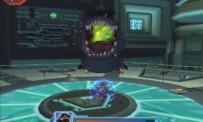
Orb. Dobbo
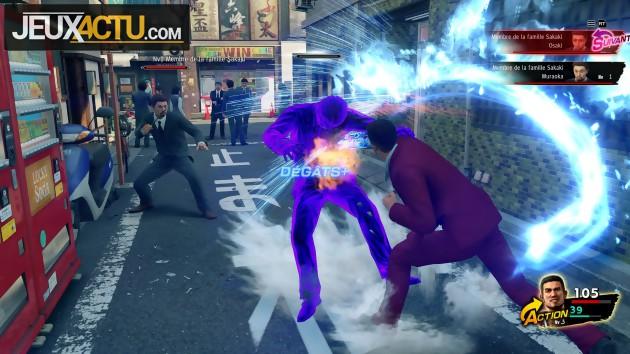
We change gears and your friend Clank has suddenly turned into a kind of amphetamine-boosted Grendizer. [Photo 038]. Your objective will therefore be to eliminate the golgotte in front of you before it reduces you to a pile of rusty scrap metal. All shots are allowed ! When you're in close combat with your opponent, punch him to keep him away. On the other hand, when the latter tries to escape, throw a few missiles at him to prevent him from going too far. Know that by destroying the surrounding buildings, you will find nanotechs that will give you back the hair of the beast. Also pay attention to the helicopters that your enemy will launch at you to weaken you further.
Once back on the planet Dobbo, get into the taxi to return to your ship at the start of the level. Now take the route leading to the planet Joba.
12 - PLANETS JOBA
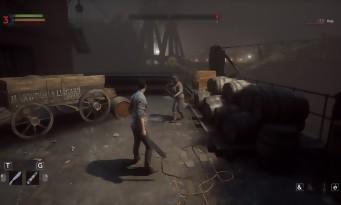
Begin your visit by crossing the bridge that is offered to you. On the other side, enemies armed with sabers crisscross the area. After eliminating them, use the dynamo on the switch to activate the machinery [Photo 039]. This is when you will be attacked by several enemies. Clean the area then retrace your steps. Just outside you will see a switch to activate with your dynamo. Cross the area that has become as quickly as possible and on the right you will have access to a nanotech capsule [Photo 040]. Now climb the ladder right after. Get rid of the guards who will not hesitate to use the plasma cannon to then open the door by standing on the switch [Photo 041]. Climb the next ladder and get ready to fight a horde of rather well-armed enemies. Take out the heavy artillery to liquidate them quickly. You will find nanotech capsules scattered all over the place to restore your strength. Right behind you will see a hanging point that floats in the air [Photo 042]. On the other side you will find a platinum bolt [Photo 043]. Retrace your steps then stand on the switch to open the doors on either side and take the passage on the right to advance through the level. You have just passed the first checkpoint. Use the dynamo on the switch and bring up a platform that will take you to the heights. Many obstacles will stand in your way to try to make you fall. With a bit of agility and anticipation, you should get there without too much trouble. Another checkpoint is located after this delicate phase. Upon entering the room, hasten to climb on the ledge opposite to access the turrets and eliminate the enemies posted above. Again, position yourself on the switch to activate the door. Then stand under the cable and jump to then let yourself slide lower [Photo 044]. You will meet a character who will offer to sell you the levitator for 20 nuts. Buy him the device to upgrade Clank who can now make you fly. Position yourself on the take-off zone [Photo 045] and fly up until you see a platform with a taxi docked on the side. Do not take the taxi and instead go to the arena to face the enemies. If you emerge victorious from the battle, you will get the Gravitational Boots that allow you to walk on magnetic surfaces. So put on your new boots to continue with a second fight in the arena to win the infiltrator. Exit the arena and use your infiltrator on the circuit to disable the electric door. To do this, you must follow the green paths in a limited time. Board the vehicle to return to your ship. Returning to the start of the level, if you have 15000 bolts in your pocket, go and buy the spiderbot glove. Cross the bridge again then head right. Further on, you will see hooks on which you can swing to reach the shore in front [Photo 046]. Then use your grapple to bring down the bridge and then move forward. Repeat the maneuver a second time to participate in the hovercraft race. Win Challenge 1 to repot the Super Boots. The other races will allow you to earn bolts. Now that you put on these new boots, return to your ship to travel to Oozla, the first planet you visited. Take the direction of the MegaCorp store and you will find a previously inaccessible passage [Photo 047]. With your shoes on, you can now walk along the wall without any worries. Then throw yourself into the conduit to face a giant snail that acts as a Boss [Photo 048]. He will attack you in four different ways. He will start by trying to mow you down with his claws. Beware because, casually, it has a very good length. Then he will throw you a kind of greenish glaviot which will destroy the water lilies on which you move. If he can't reach you, he will try to pinch you from top to bottom. And finally, he will try to gobble you up. By beating him, you will get the breaker. Now return to your ship and head to Tabora to reach a previously inaccessible platform [Photo 049]. You will be able to pilot a vehicle allowing you to search in the sand in order to find raritonium. Take a look at the map to spot the points where you can find this energy [Photo 050]. Once you have emptied the place of all crystals, go and exchange them for bolts. Then head to the building behind you. Following the path, you will come to a complex. You will see a water point that you will have to freeze with your device. Proceed to the next basin and jump on the first block. Stay on it to raise the block at its head [Photo 051]. Now freeze the water to reach the top. At the bottom you will see water pouring into a sewer, use your thermanator to freeze the waterfalls and allow you to climb the wall. Further on, you will have to let yourself glide to the next part where you will find the glider. Take the opportunity to practice by throwing yourself off the cliff and gliding to the end of the valley where you will find a platinum bolt [Photo 052]. So go see the vendor in the desert to upgrade one of your favorite weapons. Once this is done, take the direction of the planet Dobbo to restart the generator. Back on Dobbo, stand on the teleporter to get directly to the generator. Take out your glider and follow the mechanical robot without colliding with the walls of the complex [Photo 053]. When you arrive, go repair the damaged circuit and then return to the generator using the teleporter. You will need 10 bolts to access the terminal and thus obtain new coordinates to access a new planet.