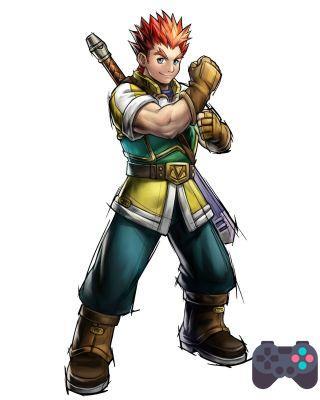
Discover the walkthrough of Golden Sun: Obscure Aurore, mixing video walkthrough and text tips and set off on an "exhaustive" conquest of this excellent RPG on Nintendo Ds, favorite of the editorial staff at the end of the year.
What would an RPG like Golden Sun: Obscure Aurora be without its tricks and above all a good walkthrough? The newest installment in Camelot Software's magical series is no exception. Here is the first part of a video walkthrough unearthed from a seasoned player that we commented on, to facilitate players in their perilous journey, in search of the evil that is eating away at Weyard!
SEARCHING FOR TERRY
After an introduction reminding you of the sad reality affecting Weyard, here you are in the shoes of our hero, with the first mission of finding his clumsy companion, Terry. Before setting off, equip yourself with the leather hat of Kiara as well as the short sword and gloves hidden in the chests of the house. Do not hesitate to also search the vases in the surroundings.
Then head east of the level to enter the cellars du Plateau of Goma. After a tutorial on how to use the Djinns, respectively use your "Move" psynergy on the pillars to clear your way and your "Fireball" psynergy on the red flowers to destroy the roots that prevent you from continuing. Finally, use your "Bud" psynergy on the green plants to access the inaccessible platforms of the Confused Wood. Don't forget to collect the objects scattered in chests, very useful for later, while exterminating the few monsters that attack you during random battles.
Arrived in the passage of the Abandoned Mine, replenish your psynergy points with crystal violet and progress through the mines until you find Terry unconscious. Head to the left and use the "Bud" spell on the plant to go down near the red flower next to the vortex. By attacking it with your fire psynergy, you will engage the fight against the very first boss of the game! Weak, don't bother attacking it in melee and favor summoner spells which should defeat it in less than one turn. Then head north to leave Confused Woods, with Terry safe and sound.
THE LOGGERS' VILLAGE
Terry having broken Kiara's father's hang glider, you therefore go in search of a hang glider to repair it. Head to the world map and after Flint joins your team, go to the Bazar de Gyver West. On site, do not forget to search the chests and the few vases in the houses to supply your inventory but also to stock up on grass at the Gyver's Shop. You can also familiarize yourself with the psynergies by going to the north of the city, to the training ground. In addition, a Djinn is recoverable not far from there. In front of the entrance to the training ground, line up the pillars and cross them by climbing the tree. Go to the heights on the right and with "Bourgeon" go down on the vine and recover the Djinn Forge. Back up and slip out the west exit to the Hilly road of Goma.
On site, your "Whirlwind" psynergy will allow you to twirl the flowers that you can reach by climbing trees. Your fire psynergy will power the steam zipline, opening the way to the rest of the level. Continuing north, you need to use tricks and thinking to move the logs so that the leftmost one rolls down the slope and falls lower into the river, too wide for you to cross. Done, this action will give you the possibility of recovering the Ax of Themis hidden in a chest. Go back upstairs and continue east to the Camp de Timber.
After a rescue sequence, go behind the house and use "Move" on the pillar to return to the level before. Pull the zip line with your fire spell and use it to head towards the Djinn Souffle who won't give up. Fight it to get it back. Retrace your steps and go east of Timber's camp. Go down the ladder and grab the Mercury Djinn, Ice. Then leave the camp and go south to Depot of Lumberjacks. On site, use your psynergies to reach the cave to the north and obtain the summon of Zagan. Therefore, leave this place and always continue south to pass the Porte de Konpa giving you access to the ruins. Take the opportunity to do random fights. You should come face to face with the Mercury Djinn, Fever.
KONPA RUINS
In Ruines de Konpa, head first to the easternmost room and push the yellow orb "activating" the ruins, including the slab of light from the previous room. Place yourself on the latter and move with your magic the different statues on the slabs of light which will make new platforms appear to help you move to the other side of the room. In the next room, push the block of stone using your psynergy, in the void. Continue to the left and activate the switch in front of the statue in the main room to make a new staircase appear. Go through the right entrance this time to return more quickly to the main room and head towards this new passage leading to a room with this time, a purple orb. Use your "Whirlwind" spell on the orb to make blue slabs appear on the ground (functioning the same way as the flying flowers on the previous level) and activate the level's elevators. Then use "Whirlwind" on the ground to make your way into the next room upstairs.
After recovering the Elvish shirt in the chest of the next room, this passage is more perilous. The goal here is to use the pillars and slabs on the ground so that you can pass through the northern entrance to the room. The video will explain it to you better! Then take the elevator to the next room and push the stone block into the void. Take the second activated elevator to the right in the main room and push the last block. Then head to the room where the blocks fell and complete the puzzle in the center of the room. Exit and thanks to the catches appeared, recover the Book of Glyphs held by the statue and return to the block room to decipher the tablet at the back of the room.
At this moment four statues appear. Move them counter-clockwise so that their arm is pointing at the center. This done, the central rose window turns into a new elevator. Climb the floors to find the Seizure Crystal hidden in a chest. Equip yourself with it and cling to the pillar on the right to catch with this same psynergy the stone key allowing you to leave the room.
Go through the lowest path on the left and continue to the right to enter the room with the red badge. Use "grab" to stand in front of the red orb and throw a fireball at it to activate it. Retrace your steps and use your "Fireball" to destroy the stone blocks and the stele in the main room. Opening the way to underground galleries, use your psynergies on the stalagmites and take the Elven Rapier in passing. Before entering the next room, heal yourself! After a short scene, a fight will start against 3 enemies. Attack only one enemy at a time in priority and unleash your Djinns on them in priority, your psynergies being useless because of the psych grenades which reduce your PP.
Fight over, enjoy the cutscene and exit to the right. Push the first log on the path, then the one on the right. Push the first log upwards and finally push the left one to form a bridge allowing you to exit the cave. After another cutscene, climb the rightmost tree and use "Bud" on the plant. Climb on the vine, restore your PP and PV near the statue and enter the cave to recover a Cookie and finally head to the world map to continue the adventure.
THE CONTINUATION OF THE SOLUCYStuck in Golden Sun: Obscure Aurora? Discover the rest of the walkthrough here in video. A walkthrough that will gradually lead you to the end of the game.

